Answering Service Call Imports
*** Important Note: This functionality is in BETA. The details in this topic are subject to change. ***
Overview
Answering Service companies are used by Funeral Homes after normal business hours, so that people can call to report a death or get service information without the Funeral Home being open.
Prior to this change, MIS Pro had an integration with ASD where we PUSHED service information for an established case to ASD (an Answering Service).
With this change, we are now PULLING First Call information from the Answering Service Company INTO MIS Professional, in order to make a First Call and generate a new Case.
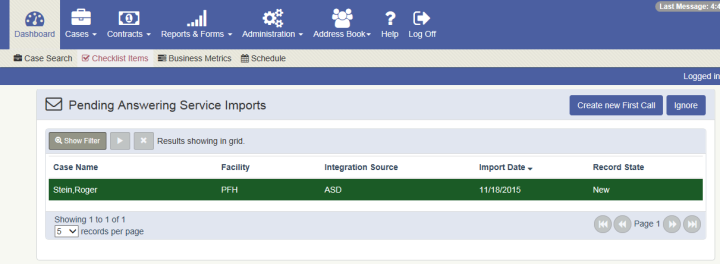
The “Pending Answering Service Imports” widget will only display at the top of the MIS Pro Dashboard if:
- The MIS Pro customer is integrated with ASD First Call and
- There are new / unprocessed ASD service records (First Call records) and
- The User Id that is logged in is an answering service user (check box on User Maintenance)
Workflow
- With the ASD integration in place for the location and the user id setup to be an answering service user, log into MIS Pro.
- The Dashboard will display by default. The “Pending Answering Service Imports” widget will display at the top of the Dashboard screen.

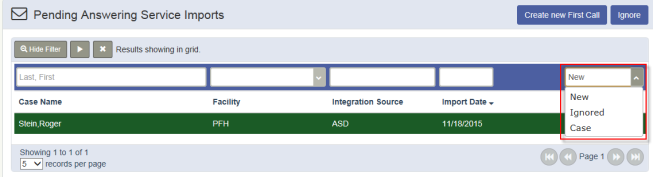
- You can click on the ‘Show Filter’ button and you can search for an answer service record.
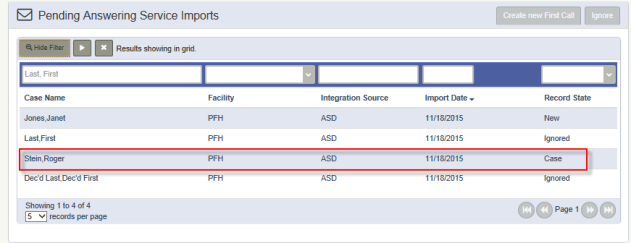
- There are 3 statuses an answering service record can have: New, Ignored and Case. You cannot change a record status from the application at this time.
- New - The answering service record is new and has not been processed yet
- Ignored - The answering service record has been set to be ignored/hidden, usually indicates the record is not needed or is bad.
- Case - The answering service record has already been processed and a case has been created from it
- If you choose to process a record, select the record you want and click on the ‘Create new First Call’ button. Clicking on the ‘Create new First Call” button will navigate the user to the “Answering Service Data” screen. This screen will display the data received from ASD.
Information on the Answering Service Data screen is organized into two types of widgets:
- Information from the Answering Service (this data is ready only)
- Information copied manually to new fields that will be transferred to the MIS Pro First Call screen
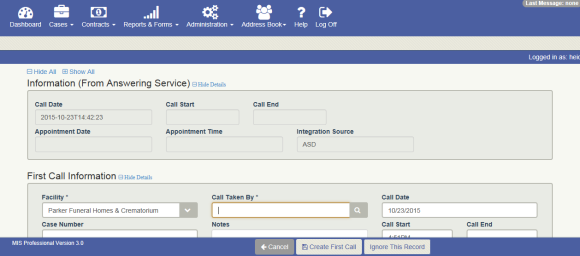
- Next, you will review all of the data that has been sent from the Answering Service in this screen. From here you can decide if the information is complete/accurate and modify as needed.
For example:
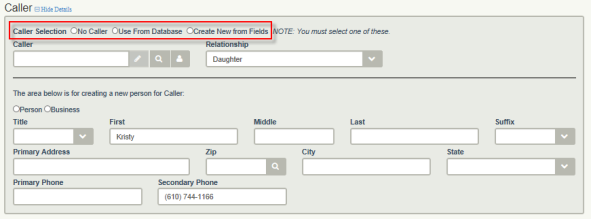
The Answering Service may have only captured part of the callers’ name. For name sections on this screen, you have the option to:
A) Select ‘No Caller’ OR
B) Use a Caller Name from the Database OR
C) Create a new Caller Name from based on the fields pulled from the Answering Service shown in the section.
NOTE: For all name sections on this screen you MUST SELECT one of these options.
- Please note that the Answering Service Data screen will also be accessible from the Cases Menu, so that you can still view the original ASD information.
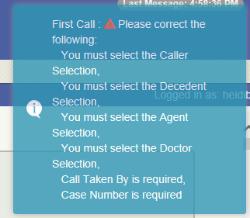
- Be aware that there are validations and rules on the Answering Service Data screen. Certain fields are required before you can successfully create a First Call.
For example:
- Conversely, if after reviewing the record you determine that you do not want to process the record, you have the opportunity to click on the ‘Ignore This Record’ button. This will update the status of the answering service record to = Ignored.
- If you choose to process the record, once all of the information has been reviewed and you are ready, you can then click on the ‘Create First Call’ button in the footer of the screen. Clicking on this button will transfer all of the data you entered on the first screen into our regular MIS Pro First Call screen.

- Use the First Call screen as you normally would when creating a First Call/Case in MIS Pro.
- After the case has been created, go back to the Dashboard widget and see that the Answering Service record is no longer visible, it’s status has now changed from ‘New’ to ‘Case’, because a case was created using it.